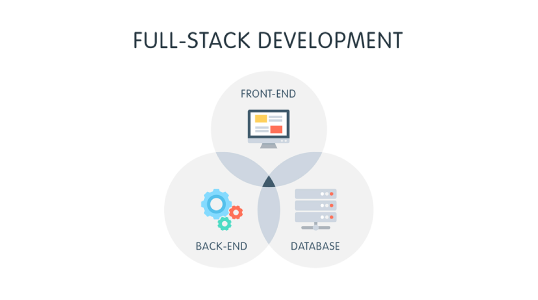
In today’s digital age, web applications are the backbone of many businesses and services. A full stack web application encompasses both front-end (client-side) and back-end (server-side) development, providing a complete solution that interacts seamlessly with users and servers. This guide will walk you through the process of building a full stack web application, covering the essential tools, technologies, and best practices.
Before diving into the development process, it’s crucial to set up your environment with the necessary tools and software:
- Text Editor/IDE: Visual Studio Code (VS Code) is highly recommended due to its rich feature set and extensive extensions.
- Version Control: Git is essential for tracking changes and collaborating with others. Create a GitHub account if you don’t have one.
- Node.js and npm: Node.js is a JavaScript runtime that allows you to run JavaScript on the server. npm (Node Package Manager) is used to manage dependencies.
- Other Tools: Depending on your preference and project requirements, you might also need Docker for containerization, Postman for API testing, and ESLint for code quality.
Framework/Library: Choosing Between React, Vue, or Angular
Choosing the right front-end framework or library is crucial. Here’s a brief overview of three popular options:
- React: A library developed by Facebook, known for its simplicity and flexibility. Ideal for building dynamic user interfaces.
- Vue: A progressive framework that is easy to integrate and has a gentle learning curve. Great for both small and large applications.
- Angular: A robust framework by Google that offers a complete solution, including state management, routing, and form validation.
Building a Simple UI
- Creating Components: Start by creating reusable UI components. For instance, create a
Header,Footer, andMaincomponent. - Routing: Use React Router to navigate between different pages. Create routes for your home, about, and contact pages.
- State Management: Utilize React’s built-in
useStateanduseEffecthooks to manage state within your components.
Setting Up the Server: Using Node.js with Express
- Initialize the Project: Run
npm initto create apackage.jsonfile. - Install Express: Run
npm install expressto install Express, a minimalist web framework for Node.js. - Create the Server: Set up a basic server in an
index.jsfile:const express = require('express'); const app = express(); const port = 3000; app.get('/', (req, res) => { res.send('Hello World!'); }); app.listen(port, () => { console.log(`Server running at http://localhost:${port}`); });
Database Integration: Connecting to a Database like MongoDB or PostgreSQL
- Choose a Database: MongoDB (NoSQL) or PostgreSQL (SQL) are popular choices.
- Install Database Client: For MongoDB, use Mongoose; for PostgreSQL, use Sequelize.
- Connect to the Database:
const mongoose = require('mongoose');
mongoose.connect('mongodb://localhost:27017/mydatabase', { useNewUrlParser: true, useUnifiedTopology: true });
RESTful API: Creating Endpoints and Handling Requests
- Define Routes: Create routes for CRUD operations (Create, Read, Update, Delete).
- Handle Requests: Use Express to handle incoming requests and interact with the database.
Fetching Data: Using Axios or Fetch API
- Install Axios: Run
npm install axios. - Fetch Data: Use Axios to make HTTP requests from your React components.
import axios from 'axios';

useEffect(() => {
  axios.get('/api/data')
    .then(response => {
      setData(response.data);
    })
    .catch(error => {
      console.error('There was an error fetching the data!', error);
    });
}, []);
Authentication: Implementing JWT or OAuth
- Install Packages: For JWT, use
jsonwebtoken. For OAuth, use Passport.js. - Set Up Authentication: Create routes for user registration and login, and generate JWT tokens upon successful authentication.
Preparing Your App for Production
- Build the Front-End: Use
npm run buildto create an optimized production build. - Environment Variables: Use environment variables to manage configuration settings securely.
Deploying to Heroku, AWS, or Another Platform
- Heroku: Create an account on Heroku and install the Heroku CLI. Run
heroku createandgit push heroku mainto deploy. - AWS: Use AWS Elastic Beanstalk or EC2 to deploy your application. Follow AWS documentation for detailed steps.
Building a full stack web application may seem daunting at first, but by breaking it down into manageable steps, it becomes much more approachable. From setting up your environment to deploying your application, each step is an opportunity to learn and grow as a developer. Start small, build iteratively, and don’t be afraid to experiment and make mistakes. Happy coding!
